Here's the original photo...the process works best when you have an open background area like sky or a wall. (Picture this: I spotted this kid running up the dune, and his dad was chasing behind him. There I went, running interference thru the sand with camera in hand, trying to get the shot without the dad in it. Ah, the lengths we go to!)

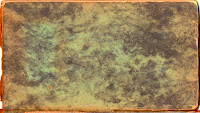
Here are some of my scans:

And here's the photo using the scans in just a couple variations.
Here's the basic tutorial...some knowledge of Photoshop is essential:
1) Open an image.
2) Open a texture file, copy and paste or drag into original image. If necessary, drag handles to cover the image. (I often add multiple texture layers to one file, turning them on and off to judge the various effects.)
3) With the texture layer selected, go to Blending Mode and choose Multiply, Soft Light, or Overlay.
4) Adjust the layer Opacity as you like.
5) Use the Eraser tool (or a Layer Mask) to remove texture from any areas you want left alone.
For advanced exploration and seemingly endless variations, adjust the color and/or saturation with Hue/Sat adjustment layer(s).
Let me know if you have any questions!


No comments:
Post a Comment